All posts by CoffeeNerd

Roaster Upgrade – Arc 800

This is my new roaster, the Arc 800 RTD from Showroom Coffee

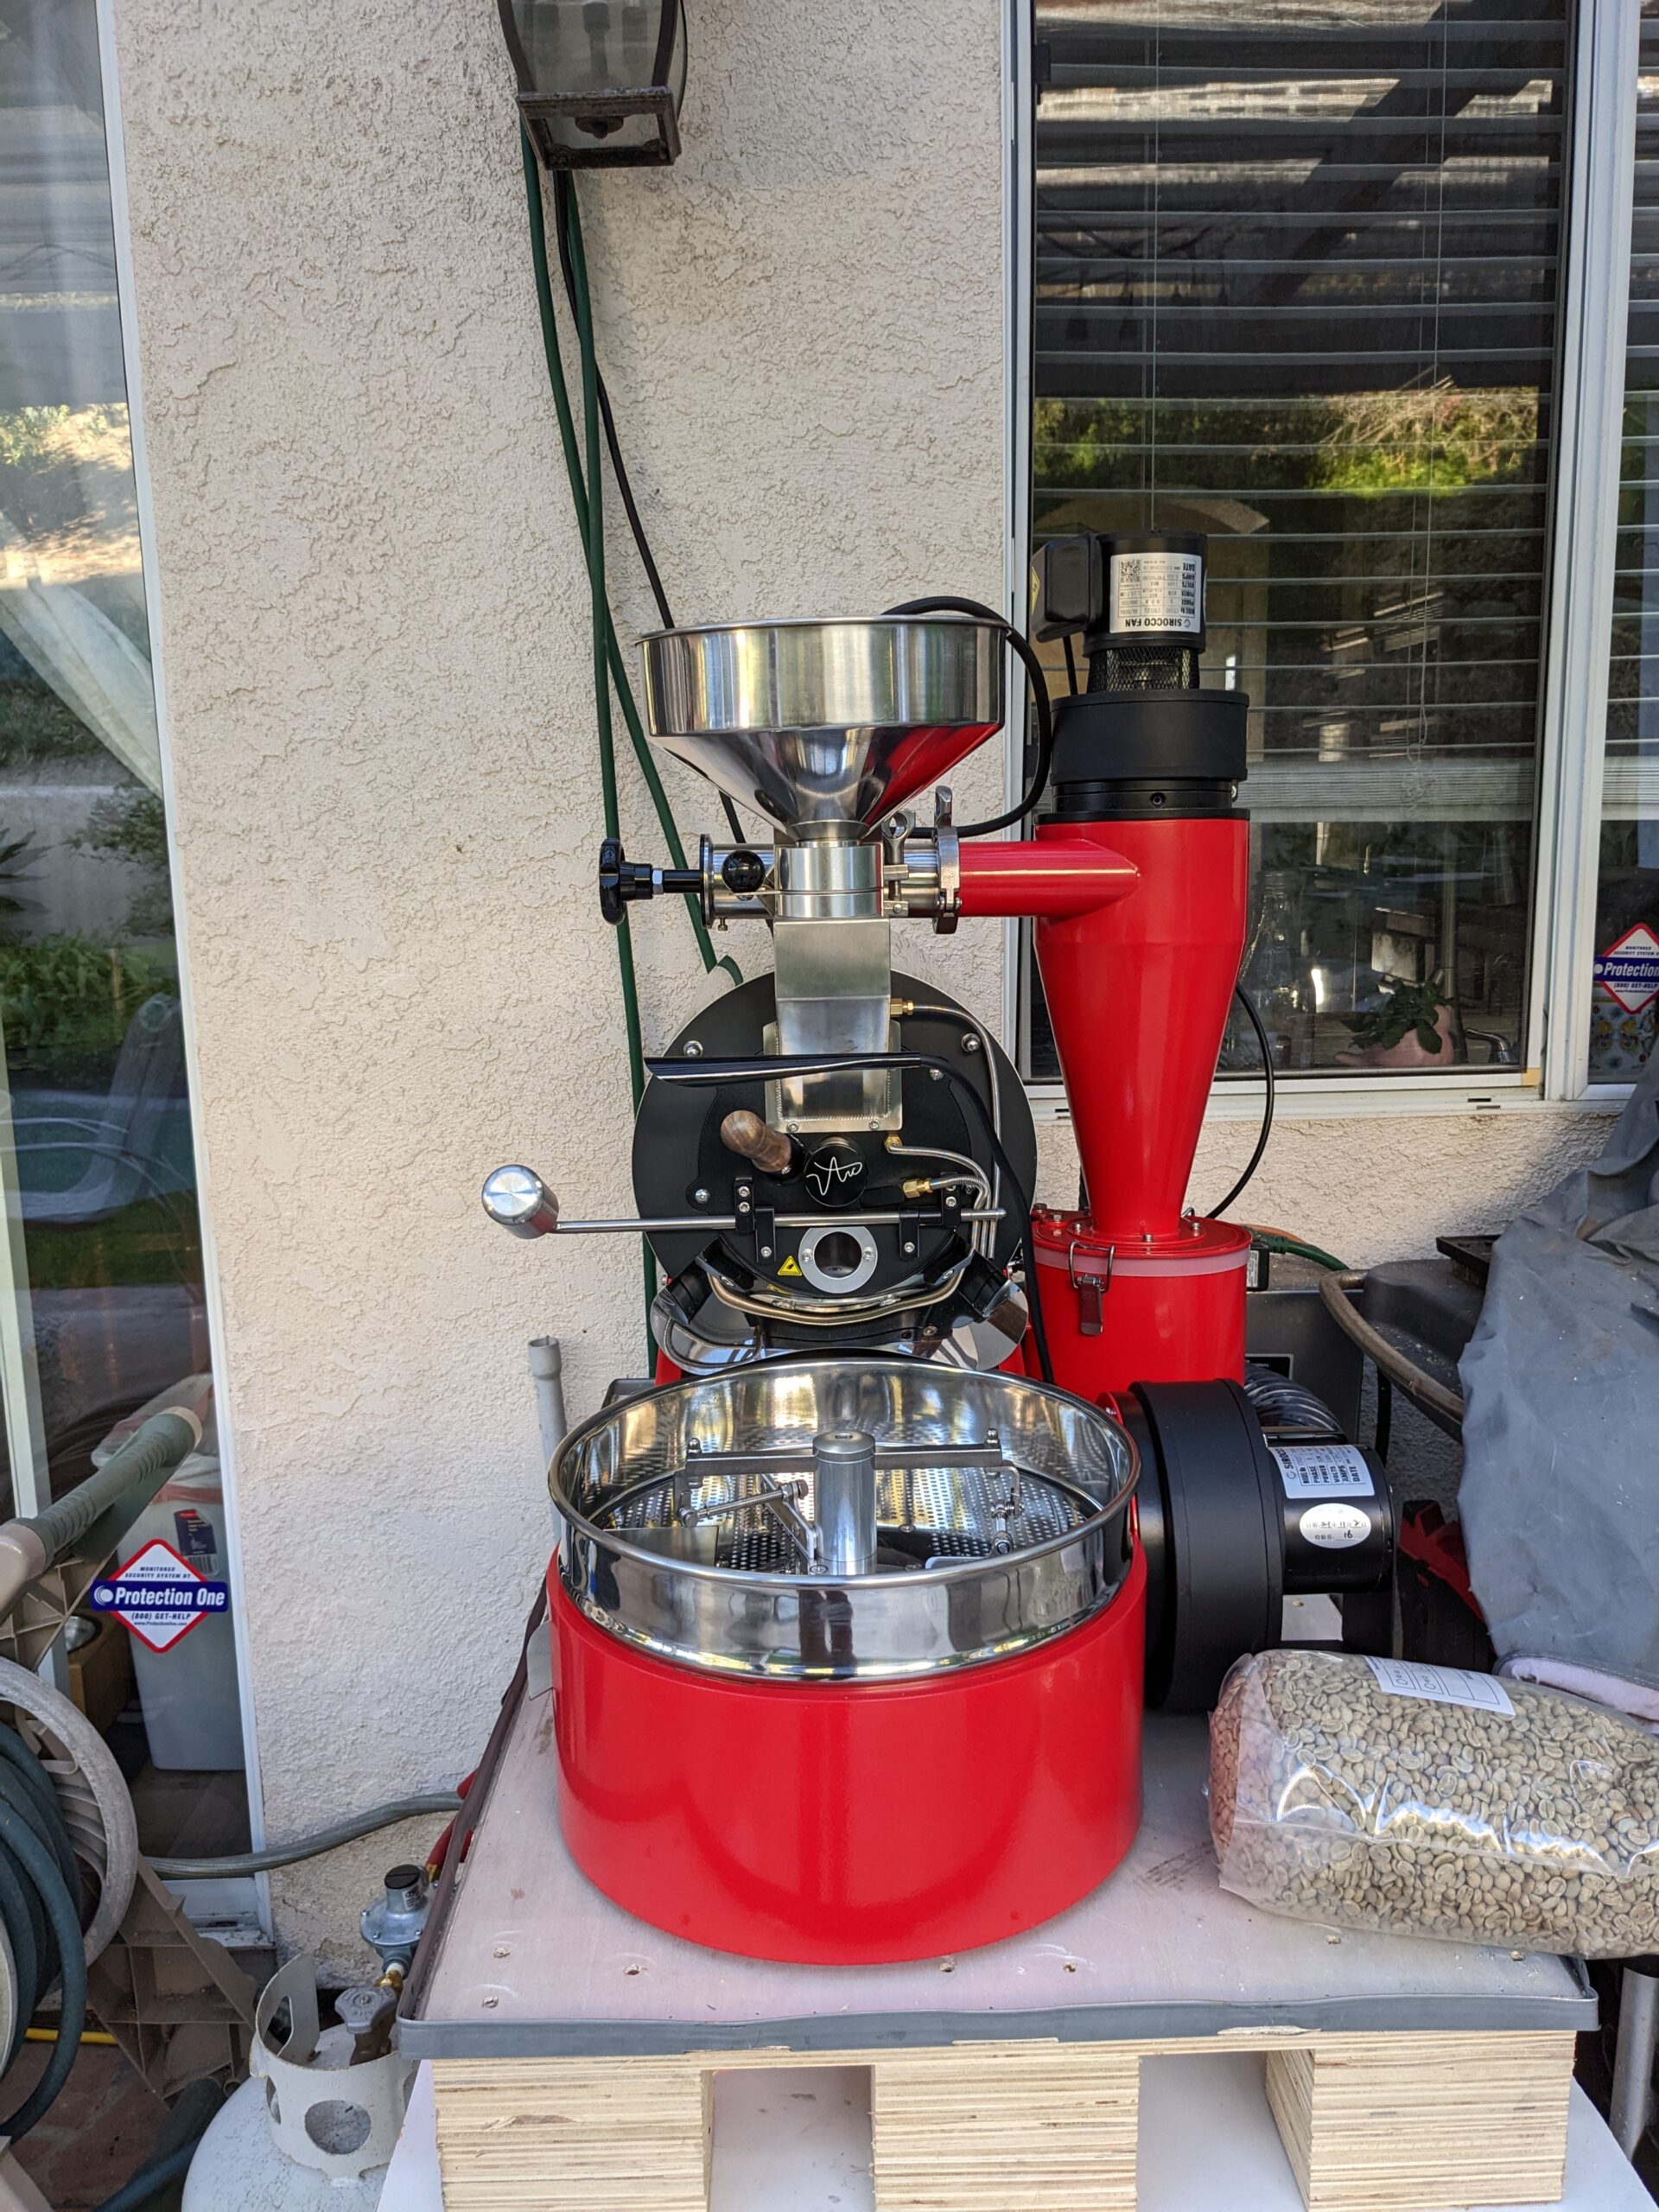
I’ve been sitting on this post for a few years actually. I got this roaster 2 years ago. It is very expensive for an 800gr roaster, but in my opinion it is absolutely worth it. Unlike most drum roasters where you really only can use 80% of the rated capacity, the Arc 800 from Showroom Coffee is seriously over powered and can roast the full rated capacity easily – especially with the new 50psi regulator. Depending on your profile, you an roast a full 800g in anywhere from 8 to 12min. And, you can do 300gr sample roasts too. For sample roasts, I have adapted a method I saw in a Mill City video – I set the fan pretty low, and gas at 12.5psi and just let the beans go until 1st crack stops. It’s almost always about 8 min. For full roasts I’ve been using the “soak” method where I charge the beans with gas off and then at the 60s mark, I turn the gas on (that is usually within 20s of the turning point.)

The build quality of the Arc 800 is superb and is basically a scaled down version of a large production roaster. You have complete control over drum speed, air flow, and gas (power) and 3 RTD probes for computer monitoring with a computer. I have it hooked up to Artisan (hard to beat for a free program – but I pay for the Home Roaster inventory system). There is a small LCD that has the BT, ET, inlet temp and a timer if you want to go sans-computer.

The roaster does weigh about 100lbs, so it’s not “portable” – you won’t want to be moving it around a lot. Find a nice home for it, or get a stainless steel wheeled restaurant cart for it. It is definitely something that will need space, probably too big for your kitchen. And, you will need to vent it to the outside if you’re installing it indoors. If comes with a small cyclone and a very powerful exhaust fan and enough insulated tubing to hook up a vent pretty far away from the roaster.

Because this is essentially a commercial roaster, there is a necessary maintenance schedule outlined in the manual. This is not just a toaster oven (not meaning to dig at Behmor, but sorta…I have one too.) The learning curve is steep, so do a few extra seasoning roasts to help you learn how the heat and air settings affect the roast. The manual comes with some starter profiles so you aren’t totally thrown into the deep end.

To quote Ferris Bueller. It is so choice. If you have the means I highly recommend picking one up.

Beans cooling after a roast in the Arc 800

Timemore 64s

My Timemore Sculptor 64s. Ah, the Timemore Sculptor 64s. I succumbed to FOMO. You know, you buy these things, you think, “Is this just another contraption, another gadget promising nirvana in a cup, only to deliver… well, coffee, but with an added layer of existential dread?” But with this one, it’s different. It’s actually good.

The Grind: A Metaphor for Life, Only Consistent and Reliably Repeatable

The grind. That’s the thing, isn’t it? The consistency. You get up in the morning, you’re already bracing yourself for the day’s inherent inconsistencies, the inevitable disappointments. But then, the Sculptor 64s delivers this uniform grind. And the best part? The reliability of going back and forth on grind settings. This is a crucial point, really. I can be grinding some exquisite Panama Geisha for a pour-over, dialing it in precisely at, say, 10.8. And then, without skipping a beat, I can swing it all the way down to 3.2 for an espresso. And it works. It actually works. No fuss, no recalibration anxiety. It remembers. It’s like a very consistent, understanding therapist for your coffee beans.

For pour-over, I slow it down. Like a quiet conversation, you know? You want to extract every nuance, every subtle hint of flavor, without rushing it. It’s almost… delicate. And the cup? It’s clean, sweet. It’s like the coffee bean finally gets to express itself, without all the static, literally and figuratively, of life.

Now, espresso. That’s a whole other neurotic beast. I tried the slow thing, thinking, “More contact, more flavor, more…something profound.” But no. Faster. It’s like the universe telling you, “Some things are better quick, buddy. Just get in there, get out, and enjoy the jolt.” The faster speed, for me, it just…works. A more vibrant shot. I don’t know why. I’m not a physicist, I just roast the coffee and drink it. It’s probably some cosmic irony I haven’t yet figured out.


The Aesthetics and the Agony of Static

And the look of it. It’s solid. Substantial. Not flimsy, like some of the people I’ve dated. It has a magnetic grinds cup, which is a nice touch. Keeps things from flying around, mostly. It looks good on the counter, too. Sleek. Modern. You know, trying to maintain some semblance of order in a chaotic world.

But then, the static. Oh, the static. It’s like a clingy ex, you just can’t shake it. If you try to grind directly into the portafilter, it’s a disaster. Grounds everywhere. Clinging to the sides, like my anxieties clinging to me in a crowded room. It’s a mess. A beautiful, delicious mess, but a mess nonetheless. My solution? Even with a little spritz of water on the beans, the static is substantial. So, use the magnetic catch cup AND a spritz. And, yes, I do the hipster WDT too. It’s a small ritual, a little dance you do to appease the coffee gods and their electrical charges. It’s not ideal, no. But then, what in life ever is?


Conclusion: Flawed, Like Us All

So, despite the static, which, let’s be honest, is a minor neurosis compared to the grander existential quandaries, the Timemore Sculptor 64s has been a major upgrade to my coffee routine. My Macap is now sitting sadly in my garage next to a power drill. The grind quality, the robust build, the sheer, unshakeable reliability of changing settings, and the ability to control the speed for different moods of coffee… it elevates the whole morning ritual. It’s transformed my home brewing, given me consistently delicious cups. And, in a world filled with disappointments, that’s something. t’s got its flaws, like us all. But, if you’re looking for a grinder that mostly gets it right, despite its own little quirks, then yes, I’d recommend it. Now, if you’ll excuse me, I need another cup. I have to go confront the day.

Berliner Kaffeerösterei, Berlin

If you are looking for afternoon Kaffee und Kuchen in the Uhlandstraße area near Kudamm in Berlin, check this place out. The coffee is not earth-shattering, but the cake selection and the attached chocolate store are worth a stop. And, it is air conditioned (a rarity in Germany.) Our server had a wonderful sense of humor and insisted that the milk I selected for my flat white should come only from a “happy cow.” I stopped here twice and the cake selections were different each time.

A definite recommendation for a warm Berlin summer afternoon.

Coffee Drink Your Monkey, Berlin

Coffee Drink Your Monkey in Berlin Germany front patio and entrance.
Coffee Drink Your Monkey in Berlin Germany

Coffee Drink Your Monkey has a very funny name. I’m not sure if there is a local German phrase which is a play on words that this name comes from or not, but it certainly caught my attention when looking for a place to have afternoon Kaffee und Kuchen. I had a flat white. It was o.k. They close at 7pm and I arrived at 5:30, so the workers seemed to already have closing on their minds, so the service was “short”…not rude, just to the point and quick.

I also tried their freshly made lemonade. This was interesting. A combination of noise and my poor German pronunciation resulted in the Ginger version. What this drink turned out to be was literally fresh squeezed lemon juice, concentrated ginger syrup, muddled Mint, and sparkling water. So, really this turned out to be an oversized sparkling ginger shot. If you like that sort of thing, which I do, it was good.

If you are in the Savignyplatz area of Berlin, and need a rest and a snack, this is a reasonable place to stop.

FinalPress – A Kickstarter Fail

I have only ever backed two things on Kickstarter. The first was PuckPuck. It is an Aeropress gadget that turns your Aeropress into a slow drip cold brew system. It works…in fact, it’s plain awesome. The second item is the most recent, the FinalPress. The promise is a single cup brewing system that combines the immersion style of a French Press with the convenience of a single cup brewed right in the mug you are going to drink out of.

FEB 2025 – Original Review Below – I stand by the review, but I will note that the product has been updated and the instructions shipped with it have changed A LOT since the original Kickstarter release.

It does not work. Check out my video review below.

Bezzera BZ10 Repair – New Pump

After nearly 10 years, the vibratory pump on my trusty Bezzera BZ 10 espresso machine started to fail. The expected life-span of these pumps is actually rated at only about 4 years, so lasting almost 10 seems impressive. However, as they say hind-sight is 20/20 and thinking back, signs of failure started years ago.

However, last week, it was clear. Shots ramped up to brew pressure slowly, and they could not hold through the shot…frequently dropping to as low as 2bar by the end. If I had a pressure profiling machine, that would be fine, but the BZ10 doesn’t do that. So, it was time to replace the pump.

BZ10 with case off showing internals with new pump installed and old pump on counter.

In the above picture you can see the old pump removed and the new pump installed. The process is really very simple provided you have the necessary tools. The entire effort took me 20 minutes.

Tools Required

  • Replacement pump. I found the exact replacement on Amazon here.
  • 3mm Allen wrench for machine case AND the pump vibration dampeners
  • Two(2) Crescent wrenches (small and large – or you may also be able to use a pair of vice-grips, but be really careful)
  • Teflon tape

The first thing you do is remove the water tank from the back, tip the machine on its side, and remove the 4 Allen bolts that hold the case one. The case then slides DOWN to unlock the parts that attach to chassis/frame of the machine. You can search the internet for this process.

After the case “falls” down, you can remove it from around the chassis/frame and you will see the pump on the side. Removing the pump can be a little tricky unless you have an Allen wrench that can fold a bit. But, you can push/twist on the rubber vibration dampener mounts that hold the pump to get better access.

Once the Allen bolts are removed, you use a crescent wrench to unscrew the water line from the brass end.

Closeup image of the brass end of the installed pump showing the water line connection.
Brass end of the pump

Once the brass coupling is removed, the connection on the other side of the pump is just a pressure fit, and you can simply wiggle that off. Remove the rubber vibration dampener mounts, and the electrical connections and the pump is now free.

Now, you need two crescent wrenches. One goes on the flat part of the elbow joint, and the other in the grooves of the brass pump output. Unscrew the 90 degree elbow because you need to transfer that to the new pump. This is a very tight connection. If you are using vice-grips be careful not to damage the brass connection. Mine had a little gunk in it, so I cleaned it up. But, if you are using hard water, this is a good time to de-scale that part.

Attach the 90 degree elbow to the new pump. I wrapped the threads with some Teflon tape to ensure a good connection. This is a cold water system at this point, so heating of Teflon is not an issue, but still make sure the tape you are using is safe for water lines. Also, attach the vibration dampener mounts, re-connect the waterline on both sides, and the electrical connections. At this point, turn the machine back on and do a leak test. The pump will need to prime for several seconds to suck water through the new system, but make sure there are no leaks before you seal everything up.

Once you are satisfied there are no leaks, fully re-install the pump by screwing the vibration dampener mounts back to the machine chassis and put the case back on the machine.

My machine is now like new. Pressures are all back to normal (I took the time to also re-adjust the OPV valve – on the other side of the machine) and the machine is significantly quieter with the new pump.

Happy Brewing.

Mostra Coffee 4S Ranch

Counter at Mostra

I spent the morning at Mostra Coffee’s 4S Ranch Location. Mostra has been around in San Diego for a while now, and has added a few cafe locations in the Rancho Bernardo area. The coffee is very good. It’s pretty typically 3rd wave, but I did not find it to be overly acidic or tart as is sometimes the case. The flat white I had was creamy and flavorful. They have free WiFi and the location has indoor and outdoor seating. The location is in a corner of the 4S Ranch Commons .