Category Archives: Equipment

xBloom Studio Review: I Let a Robot Make My Coffee and I Have No Regrets

The xBloom Studio. I bought it. I’m not sure if this is a triumph of engineering or a sign that I’ve finally, completely surrendered to the machine. Literally. You see, I’ve spent years perfecting my pour-over technique. The careful blooms, the deliberate pours, the ritual. And now I’ve handed all of that — every single variable — to a robot. And the robot, it turns out, is better at it than I am. Or at least, more consistent. Which, when you think about it, is both deeply satisfying and mildly humiliating.

What the xBloom Studio Actually Is

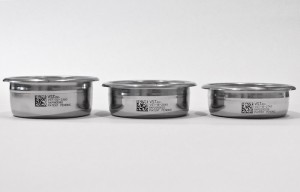
It’s an all-in-one pour-over machine with a built-in grinder, a precision scale, and a phone app that connects via Bluetooth. The ecosystem also includes xPods — little pods of whole bean coffee (whole bean, not pre-ground, which matters enormously) sourced through partnerships with specialty roasters. Each xPod comes with an NFC recipe card: tap it to the machine, and it loads the brew recipe the roaster designed specifically for those beans. Not a generic “medium roast” profile — the actual intended recipe, dialed in by the people who grew and roasted it. You open the xPod, put the beans in the grinder, put the pod on the docking ring (it’s also the brew filter), tap the recipe card to the top of the machine, and the machine does the rest — grinding, blooming, pouring, the whole ceremony. Three modes: Autopilot (fully hands-off), Copilot (you pour, it guides), and Freesolo (manual, like a very fancy kettle stand). For someone who has spent a decade obsessing over this stuff, the Autopilot mode is both a relief and a small identity crisis.

What actually made me pull the trigger was a business trip to LA. I walked into Intelligentsia in Hollywood and there was one sitting behind the bar. I asked what the deal was — this did not look like standard café equipment. The barista told me they’d moved on from their previous high-end automated pour-over setup and had been running the xBloom in its place. I’ll leave the details out of it — it wasn’t my story to tell. But a specialty coffee institution making that swap, replacing a machine that costs multiples more, with this thing? That was enough for me.

The custom recipe programming sealed it. I have dialed in my pour-over technique over years of iteration — specific bloom volumes, specific temperatures per pour, specific wait times. I can now replicate exactly what I do by hand, with perfect repeatability, every single morning, while I stand there staring blankly at the wall waiting for the caffeine. Set it and forget it. It’s the dream.


The NFC Card Situation (or: A Good Company Handling a Bad Thing Well)

The machine ships with a sample supply of xPods — whole beans from a partner roaster (Galactic blend is what I got), plus an NFC recipe card that tells the machine exactly how to brew them. The concept is genuinely great. My NFC card, however, was dead on arrival. The machine couldn’t read it. Not a great first impression, I’ll be honest.

But — and this matters — xBloom’s customer support got back to me quickly. The box also includes a separate generic NFC card with a baseline recipe, which I was able to use to confirm the machine itself was perfectly fine. The bad card was with the included beans, not a machine problem. And the recipe for those specific beans was available in the app anyway, so I was still able to brew them while I sorted things out. Minor annoyance, handled well. I’d rather see a company respond fast with good communication than never have a hiccup at all. The former tells you something real about them.


The App: Mostly Good, Two Specific Gripes

The xBloom app is genuinely well-designed. The recipe library is extensive, the community sharing feature is a nice touch (see below), and the level of control you have over brewing parameters is impressive for what is ostensibly a consumer appliance.

That said, two things:

Search is not obvious. I spent longer than I care to admit looking for the search function. It’s there. It works. But it’s not where you’d instinctively look, and for an app whose value is largely in discovering recipes, that’s a meaningful friction point.

Recipe creation sliders are fiddly. When you’re building a recipe, you adjust parameters by pressing and dragging sliders. Getting a precise one-unit change — say, moving grind size from 54 to 55 — is an exercise in patience. They really should let you just tap the displayed value and type in a number directly. This is not an exotic ask. This is basic UX. Hopefully a future update addresses it, because the recipe customization is otherwise excellent.


My Recipes (Steal Them)

These are the recipes I dialed in to replicate my own hand pour-over technique. Both use a 1:16 ratio with 16g of coffee to 256ml of water. They’re three-pour recipes. Use them, share them, judge me if you disagree with my temperatures.

If you want to go further down the rabbit hole, xBloom’s Collective recipe hub is worth a browse — it’s the community library of shared recipes I mentioned earlier in the app section. Recipes organized by bean, roast level, and brewing style, submitted by other users. Useful for getting your bearings even if you end up customizing everything yourself anyway.

Light Roast Base

ParameterValue
Dose16g
Total Water256ml
Ratio1:16
Grind Size54
Bloom56ml @ 95°C — wait 36s
Pour 2100ml @ 95°C — wait 30s
Pour 3100ml @ 88°C

→ Load this recipe in the xBloom app

Medium Roast Base

ParameterValue
Dose16g
Total Water256ml
Ratio1:16
Grind Size58
Bloom56ml @ 90°C — wait 15s
Pour 2100ml @ 90°C — wait 30s
Pour 3100ml @ 85°C

→ Load this recipe in the xBloom app


Verdict

The xBloom Studio is genuinely impressive. If you are a pour-over person who wants automation without sacrificing control — and who is willing to invest the time to dial in your own recipes — it’s hard to beat. The grinder is solid, the scale integration is seamless, and the repeatability is everything it promises to be. My morning cup has never been more consistent, and I’ve never had to think less about it. That is, depending on your perspective, either a tragedy or a triumph. I’m choosing triumph.

Fix the slider UX, xBloom. Everything else: keep doing what you’re doing.


Get One

Available on Amazon in several colors. I went Midnight Black, because of course I did.

Roaster Upgrade – Arc 800

This is my new roaster, the Arc 800 RTD from Showroom Coffee

I’ve been sitting on this post for a few years actually. I got this roaster 2 years ago. It is very expensive for an 800gr roaster, but in my opinion it is absolutely worth it. Unlike most drum roasters where you really only can use 80% of the rated capacity, the Arc 800 from Showroom Coffee is seriously over powered and can roast the full rated capacity easily – especially with the new 50psi regulator. Depending on your profile, you an roast a full 800g in anywhere from 8 to 12min. And, you can do 300gr sample roasts too. For sample roasts, I have adapted a method I saw in a Mill City video – I set the fan pretty low, and gas at 12.5psi and just let the beans go until 1st crack stops. It’s almost always about 8 min. For full roasts I’ve been using the “soak” method where I charge the beans with gas off and then at the 60s mark, I turn the gas on (that is usually within 20s of the turning point.)

The build quality of the Arc 800 is superb and is basically a scaled down version of a large production roaster. You have complete control over drum speed, air flow, and gas (power) and 3 RTD probes for computer monitoring with a computer. I have it hooked up to Artisan (hard to beat for a free program – but I pay for the Home Roaster inventory system). There is a small LCD that has the BT, ET, inlet temp and a timer if you want to go sans-computer.

The roaster does weigh about 100lbs, so it’s not “portable” – you won’t want to be moving it around a lot. Find a nice home for it, or get a stainless steel wheeled restaurant cart for it. It is definitely something that will need space, probably too big for your kitchen. And, you will need to vent it to the outside if you’re installing it indoors. If comes with a small cyclone and a very powerful exhaust fan and enough insulated tubing to hook up a vent pretty far away from the roaster.

Because this is essentially a commercial roaster, there is a necessary maintenance schedule outlined in the manual. This is not just a toaster oven (not meaning to dig at Behmor, but sorta…I have one too.) The learning curve is steep, so do a few extra seasoning roasts to help you learn how the heat and air settings affect the roast. The manual comes with some starter profiles so you aren’t totally thrown into the deep end.

To quote Ferris Bueller. It is so choice. If you have the means I highly recommend picking one up.

Beans cooling after a roast in the Arc 800

Timemore 64s

My Timemore Sculptor 64s. Ah, the Timemore Sculptor 64s. I succumbed to FOMO. You know, you buy these things, you think, “Is this just another contraption, another gadget promising nirvana in a cup, only to deliver… well, coffee, but with an added layer of existential dread?” But with this one, it’s different. It’s actually good.

The Grind: A Metaphor for Life, Only Consistent and Reliably Repeatable

The grind. That’s the thing, isn’t it? The consistency. You get up in the morning, you’re already bracing yourself for the day’s inherent inconsistencies, the inevitable disappointments. But then, the Sculptor 64s delivers this uniform grind. And the best part? The reliability of going back and forth on grind settings. This is a crucial point, really. I can be grinding some exquisite Panama Geisha for a pour-over, dialing it in precisely at, say, 10.8. And then, without skipping a beat, I can swing it all the way down to 3.2 for an espresso. And it works. It actually works. No fuss, no recalibration anxiety. It remembers. It’s like a very consistent, understanding therapist for your coffee beans.

For pour-over, I slow it down. Like a quiet conversation, you know? You want to extract every nuance, every subtle hint of flavor, without rushing it. It’s almost… delicate. And the cup? It’s clean, sweet. It’s like the coffee bean finally gets to express itself, without all the static, literally and figuratively, of life.

Now, espresso. That’s a whole other neurotic beast. I tried the slow thing, thinking, “More contact, more flavor, more…something profound.” But no. Faster. It’s like the universe telling you, “Some things are better quick, buddy. Just get in there, get out, and enjoy the jolt.” The faster speed, for me, it just…works. A more vibrant shot. I don’t know why. I’m not a physicist, I just roast the coffee and drink it. It’s probably some cosmic irony I haven’t yet figured out.


The Aesthetics and the Agony of Static

And the look of it. It’s solid. Substantial. Not flimsy, like some of the people I’ve dated. It has a magnetic grinds cup, which is a nice touch. Keeps things from flying around, mostly. It looks good on the counter, too. Sleek. Modern. You know, trying to maintain some semblance of order in a chaotic world.

But then, the static. Oh, the static. It’s like a clingy ex, you just can’t shake it. If you try to grind directly into the portafilter, it’s a disaster. Grounds everywhere. Clinging to the sides, like my anxieties clinging to me in a crowded room. It’s a mess. A beautiful, delicious mess, but a mess nonetheless. My solution? Even with a little spritz of water on the beans, the static is substantial. So, use the magnetic catch cup AND a spritz. And, yes, I do the hipster WDT too. It’s a small ritual, a little dance you do to appease the coffee gods and their electrical charges. It’s not ideal, no. But then, what in life ever is?


Conclusion: Flawed, Like Us All

So, despite the static, which, let’s be honest, is a minor neurosis compared to the grander existential quandaries, the Timemore Sculptor 64s has been a major upgrade to my coffee routine. My Macap is now sitting sadly in my garage next to a power drill. The grind quality, the robust build, the sheer, unshakeable reliability of changing settings, and the ability to control the speed for different moods of coffee… it elevates the whole morning ritual. It’s transformed my home brewing, given me consistently delicious cups. And, in a world filled with disappointments, that’s something. t’s got its flaws, like us all. But, if you’re looking for a grinder that mostly gets it right, despite its own little quirks, then yes, I’d recommend it. Now, if you’ll excuse me, I need another cup. I have to go confront the day.


Get One

If the Sculptor 64s sounds like your kind of neurosis, it’s available on Amazon. The build quality, grind consistency, and the sheer pleasure of dialing it in make it well worth the investment. Click the image below to check the current price.

Bezzera BZ10 Repair – New Pump

After nearly 10 years, the vibratory pump on my trusty Bezzera BZ 10 espresso machine started to fail. The expected life-span of these pumps is actually rated at only about 4 years, so lasting almost 10 seems impressive. However, as they say hind-sight is 20/20 and thinking back, signs of failure started years ago.

However, last week, it was clear. Shots ramped up to brew pressure slowly, and they could not hold through the shot…frequently dropping to as low as 2bar by the end. If I had a pressure profiling machine, that would be fine, but the BZ10 doesn’t do that. So, it was time to replace the pump.

BZ10 with case off showing internals with new pump installed and old pump on counter.

In the above picture you can see the old pump removed and the new pump installed. The process is really very simple provided you have the necessary tools. The entire effort took me 20 minutes.

Tools Required

  • Replacement pump. I found the exact replacement on Amazon here.
  • 3mm Allen wrench for machine case AND the pump vibration dampeners
  • Two(2) Crescent wrenches (small and large – or you may also be able to use a pair of vice-grips, but be really careful)
  • Teflon tape

The first thing you do is remove the water tank from the back, tip the machine on its side, and remove the 4 Allen bolts that hold the case one. The case then slides DOWN to unlock the parts that attach to chassis/frame of the machine. You can search the internet for this process.

After the case “falls” down, you can remove it from around the chassis/frame and you will see the pump on the side. Removing the pump can be a little tricky unless you have an Allen wrench that can fold a bit. But, you can push/twist on the rubber vibration dampener mounts that hold the pump to get better access.

Once the Allen bolts are removed, you use a crescent wrench to unscrew the water line from the brass end.

Closeup image of the brass end of the installed pump showing the water line connection.
Brass end of the pump

Once the brass coupling is removed, the connection on the other side of the pump is just a pressure fit, and you can simply wiggle that off. Remove the rubber vibration dampener mounts, and the electrical connections and the pump is now free.

Now, you need two crescent wrenches. One goes on the flat part of the elbow joint, and the other in the grooves of the brass pump output. Unscrew the 90 degree elbow because you need to transfer that to the new pump. This is a very tight connection. If you are using vice-grips be careful not to damage the brass connection. Mine had a little gunk in it, so I cleaned it up. But, if you are using hard water, this is a good time to de-scale that part.

Attach the 90 degree elbow to the new pump. I wrapped the threads with some Teflon tape to ensure a good connection. This is a cold water system at this point, so heating of Teflon is not an issue, but still make sure the tape you are using is safe for water lines. Also, attach the vibration dampener mounts, re-connect the waterline on both sides, and the electrical connections. At this point, turn the machine back on and do a leak test. The pump will need to prime for several seconds to suck water through the new system, but make sure there are no leaks before you seal everything up.

Once you are satisfied there are no leaks, fully re-install the pump by screwing the vibration dampener mounts back to the machine chassis and put the case back on the machine.

My machine is now like new. Pressures are all back to normal (I took the time to also re-adjust the OPV valve – on the other side of the machine) and the machine is significantly quieter with the new pump.

Happy Brewing.

Bezzera BZ10 – 6 Years Later

After 6 years, I finally had to make a repair to my Bezzera BZ10.  The head gasket needed to be replaced.  The repair was very simple, taking only 15 minutes.  But, I figured this would also be a great time to talk about my experience with the machine after owning it for 6 years.

Staresso Espresso Maker

The Staresso Espresso Maker is a very compact portable “espresso” maker.  It makes a surprisingly good shot provided you have your grind and coffee dialed.

It can use Nespresso pods, but there is no substitute for fresh roasted and ground coffee.  Here’s a video review and the device in action.

The Short Version

The Staresso is surprisingly good and easy to use for a $60 gadget.  However, I have a feeling my results have a lot to do with my accumulated knowledge of coffee and the coffee I used.  But, again, for $60, the compact size of the Staresso Espresso maker is pretty hard to beat if you are on the go and want decent coffee.

The Long Version

This is not a true espresso maker.  There’s no way that it is generating 9bar of pressure.  But, as many people are finding, you can make espresso with far less than 9bar.  So, the Staresso is going to be very sensitive to grind size.  You will need to play with your grinder quite a bit to dial this in perfectly.

The Staresso is really pretty simple to use.  The parts all come apart and re-assemble very easily.  Filling the brew head can be a little messy however because it’s small.  They recommend 7-10gr of coffee (you aren’t pulling a typical 3rd wave 18-20gr double with this device).  In my testing, I found it hard to cleanly get more than 7gr in the little cylinder.  I got up to 9gr in there by being very careful.

Once loaded, a quick “tamp” with the back of the included scoop, and you just screw everything together.  Add water and start to pump.  I have not yet experimented with this, but the pumping builds pressure in such a manner that a pre-infusion style shot is very possible…and will likely produce a very nice result.

The shot itself is as you might expect…decent, but lacking depth and body.  You can see in the video above the crema produced is substantial (aided by the valve in the brew head), but since the pressure and heat retention are lacking, the body of the shot suffers.  However, there was a surprising clarity to the shot and I was still able to taste the fruit in my blend.

The Verdict

If you are an espresso enthusiast and want to take control of your destiny while traveling, the Staresso is compact, produces a decent shot, and at $60 is hard to pass up.

VST Precision Filter Baskets

VST Espresso Filter Baskets

It’s been a while since I’ve posted anything.  But, this is worth the time.  I’ve read about VST Precision Filter Baskets before and finally decided to see what this was all about.  I just picked up the 18gr VST STD Ridged filter basket and the difference it makes is crazy.

You can read all about the fancy holes and quality control elements of the VST Precision Filter Baskets on their site.  But, the main take away is that it’s not just a marketing gimmic.  The design of the VST baskets is superior to most stock filter baskets and the result is sweeter, better tasting espresso.  The main thing I notice instantly is that the side walls of the basket are not really tapered at all (like my stock Bezzera or Gaggia baskets).  There is a small curve near the bottom, but mostly, they look nearly straight by comparison.  This means that the coffee puck is a uniform depth all the way around.  This matters because even before you get to the precision holes at the bottom, the coffee is uniform leading to even saturation.

Now, this design also has the side effect of showing even the slightest error in your distribution and tamping technique.  So, be prepared to reset what you think you know how to do a little.  Also, I had to actually adjust my grind finer to deal get the same timing with my standard 18.5gr dose.

The result in the cup is a sweeter, more complex espresso.  Same beans, same grinder, same machine…just changing the filter basket made the espresso taste significantly better.  If you are serious about your espresso, it’s well worth the $30 for the VST basket.

FOOTNOTE:  For most home machines, you probably want the STD Ridged model.  This “ridge” is a small bump on the outside that catches the “spring” in the portafilter and locks the basket in.  The “ridgeless” models don’t lock like that…they rely on simple friction fit.  If you DO NOT have a bottomless portafilter, you might need to get one if you get the 18gr or larger basket.  They have the dimensions on their site so you can measure your gear for compatibility.